How to Enable or Disable Let's Encrypt on Reseller Hosting
Note: This is now enabled by default on all hosting, but you can use the steps to disable free SSL certificates as a reseller if you choose toLet's Encrypt free SSL certificates may not be suitable for you. Click here for our guide on comparing free vs paid SSL certificates.
NOTE 1: It may take up to 24hrs for the initial SSL from Let's Encrypt to be applied. You can use a site like https://www.sslshopper.com/ to test if the SSL has been applied.
Note 2: If you ever run into problems with Let's Encrypt for a specific website, click here for our guide on fixing these problems.
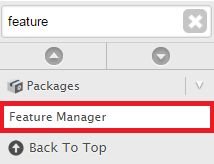
Step 1 - Log in to WHM then find and click on the Feature Manager
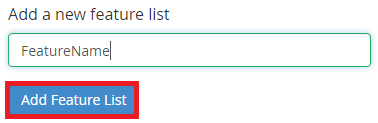
Step 2 - Type in a name for the Feature List and click Add Feature List
Step 3 - The simplest thing to do is to tick the Select All Features For: option

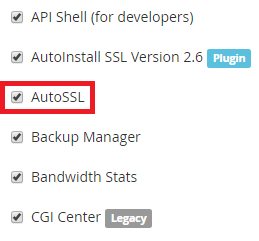
You can tick/untick features depending on what you want to be available to the cPanel accounts. The important feature here is AutoSSL.
Once you're done, scroll down to the bottom and hit Save

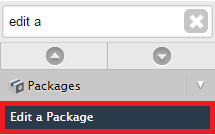
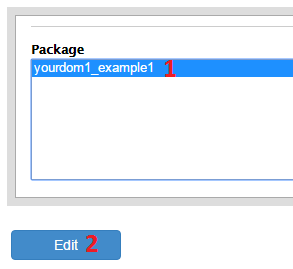
Step 4 - Search for and click on the Edit a Package option in WHM
Step 5 - Select the Package you want that Feature List assigned to and click Edit
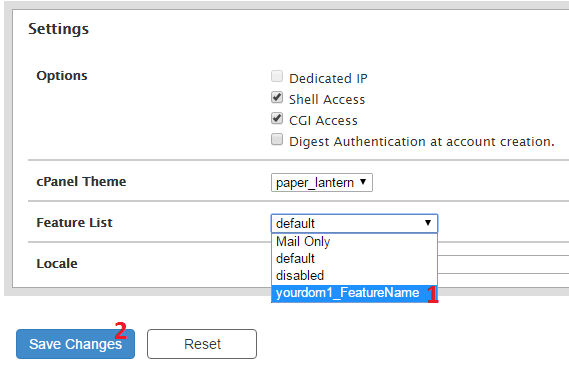
Step 6 - Select the newly created feature from the Feature List (it will be appended to start with your whm username) and hit Save Changes
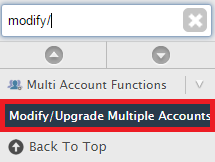
Step 7 - The last step is to reapply the package. Find the Modify/Upgrade Multiple Accounts option in WHM
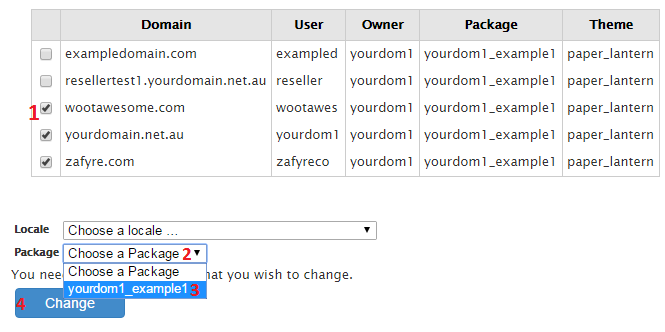
Now, select the Domains/cPanel accounts you want to apply Let's Encrypt for, chose the package (even if it's the same package they're currently on) and hit Change
The Packages will be refreshed and Let's Encrypt will be applied. Note that the script which checks for and applies Let's Encrypt certificates runs between midnight and 6 am every night so you may have to wait up to 24hrs for the certificate to be applied.
