Installing your new SSL Certificate on cPanel hosting using AutoInstall SSL
Step 1 - Please go to https://control.crucial.com.au and login.
Step 2 - Click on My Services.
Step 3 - Click on your SSL Product.
Step 4 - Copy the Token listed there.
Step 5 - Log into your cPanel account.
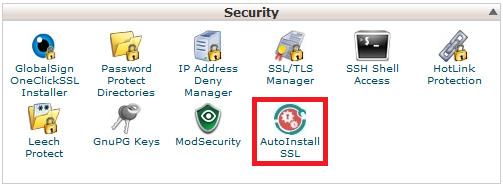
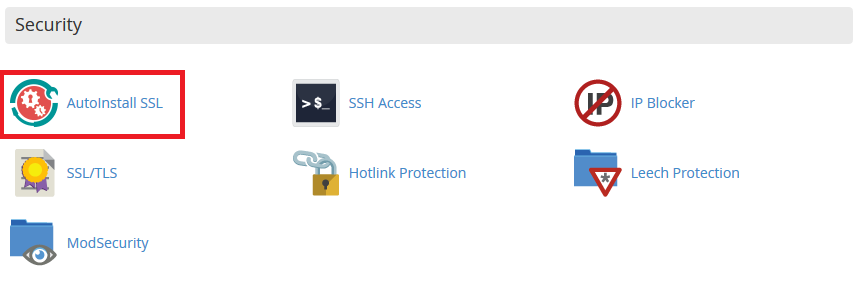
Step 7: Click on the AutoInstall SSL icon.
Classic cPanel Theme (X3):
Paper Lantern Theme:
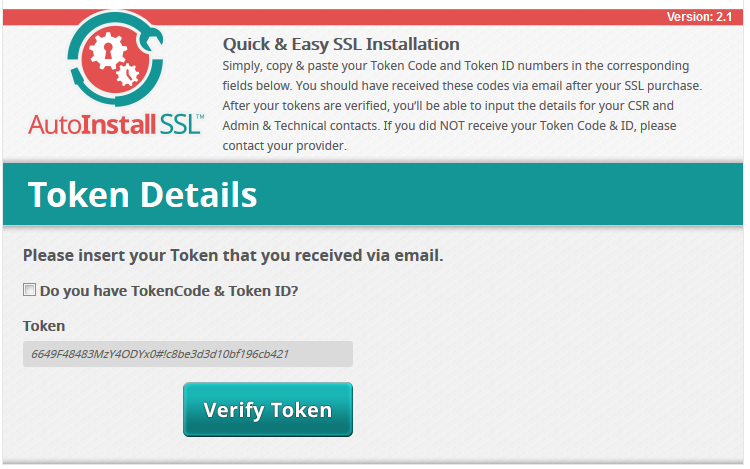
Step 8: Paste your token and then click “Verify Token”
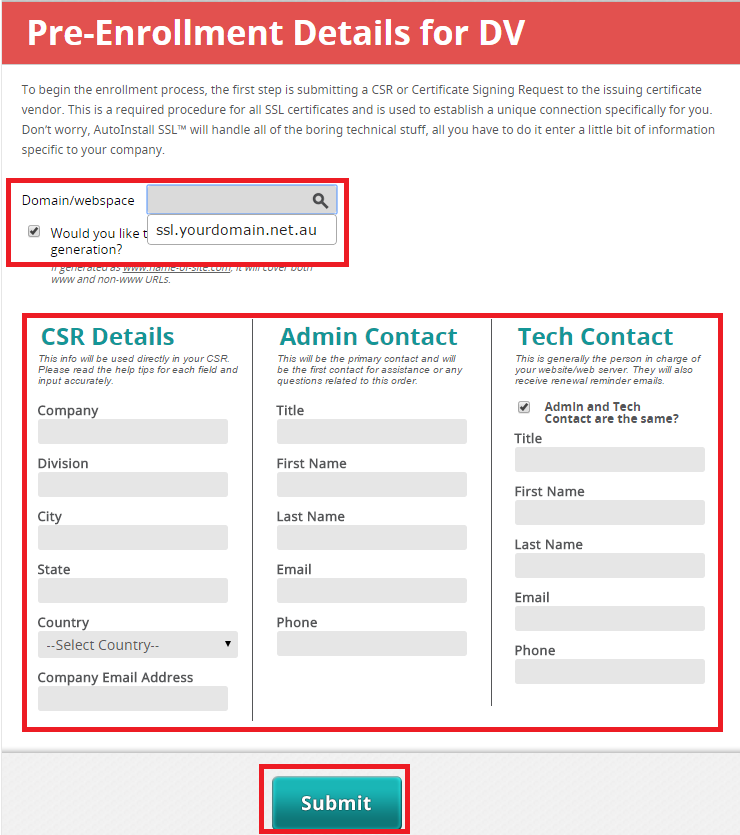
Step 9: Fill in your details and then press Submit to install the certificate.
Your SSL should now be installed and ready to go!
Occasionally, you may get this error. If you do, wait 10 minutes and click on the Click Here button.

If that fails, you may need to wait an hour or more and reinstall the certificate as per the steps in this guide.
Some SSL orders are randomly chosen to go through a manual verification process for security purposes and this is the reason for the delay, In this case, the only option is to wait.
Should you run into any problems after this, feel free to give us a call or submit a support ticket so we can look into this for you.
